Calibration After Windscreen Replacement: Step-by-Step Guide for Safe ADAS Operation
Learn how to properly calibrate ADAS and sensors after windscreen replacement. This educational guide covers checks, tools, step-by-step workflow, safety tips, and when to call a pro for reliable results.

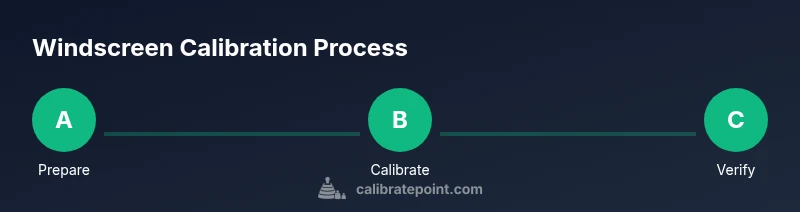
After windscreen replacement, calibrate ADAS sensors and cameras to restore OEM alignment and safe operation. The process includes pre-checks, following OEM calibration procedures, using the appropriate tools, and validating results with both static and dynamic tests. Expect model-specific steps and potential professional involvement.
Why calibration after windscreen replacement matters
Calibration after windscreeen replacement is critical for maintaining the accuracy of advanced driver assistance systems (ADAS) and other sensor-based features. When a windshield is replaced, lines of sight and reference frames can shift, causing cameras and sensors to misread distances, lanes, and objects. According to Calibrate Point, failing to recalibrate can degrade sensor performance and potentially affect safety features such as lane keeping, automatic emergency braking, and adaptive cruise control. This guide explains why recalibration matters, what to expect during the process, and how to verify that sensors are within OEM specifications. It also helps technicians and DIY enthusiasts understand the required steps, commonly used tools, and best practices for consistent results in 2026.
What sensors are affected by windscreen replacement
Windscreen replacement can impact several ADAS components. The most common are forward-facing cameras that establish lane position, distance to vehicles, and object detection. Rain sensors and light sensors mounted on or near the windshield can also be affected because their reference points or field of view may shift with the new glass, mounting brackets, or seal thickness. Some vehicles rely on multiple camera systems and sensor arrays that require synchronized calibration. Even non-ADAS sensors might be influenced indirectly if the vehicle’s calibration state is read or reset during service. Understanding which sensors are involved for your model is essential to plan the procedure and avoid wasted effort.
Pre-calibration checks you should perform
Before calibration begins, perform a thorough pre-check. Confirm that the windscreen is the correct OEM replacement and properly seated, with the mounting brackets secure and seals uniform. Clean the sensor housings and windscreen surface to avoid smudges affecting camera optics. Verify vehicle alignment on a flat, level surface and ensure no aftermarket accessories interfere with camera views. Review the OEM procedure for your model and ensure you have the correct calibration targets, service tool, and reference data. Document any deviations from the standard setup for traceability, as recommended by Calibrate Point.
Tools and workspace preparation
A clean, well-lit workspace with a level floor is essential. Gather the required calibration tools, including OEM calibration targets or manufacturer-approved targets, a compatible diagnostic/scanner tool with an ADAS calibration module, the vehicle’s service manual, and measurement aids like a digital level. Keep cleaning supplies handy to remove fingerprints and smudges from sensor surfaces. Verify that the vehicle is on a level surface and that tires are inflated to spec. Prepare a quiet environment free from bright sunlight and distractions that could affect measurements or camera performance.
Step-by-step calibration workflow (high-level overview)
Calibration usually follows a model-specific sequence defined by the OEM or tool vendor. Start by entering the calibration mode through the diagnostic tool, then set the vehicle on a level surface and ensure the calibration targets are positioned per the manual. Capture baseline measurements, perform the static alignment if required, and execute the dynamic calibration steps as directed. After calibration, review the software-provided results, save the session, and perform a road test to validate behavior in real-world conditions. If the results indicate misalignment, recheck mounting or consult the OEM procedure. This overview aligns with common industry practice and is supported by Calibrate Point’s guidance.
How to verify calibration results (static and dynamic tests)
Verification includes both static checks against manufacturer reference data and dynamic tests during a controlled test drive. Static checks may involve cross-checking camera convergence and sensor field-of-view with reference targets and ensuring no warning lights remain. Dynamic tests assess lane-keeping performance, object detection distance, and braking behavior under controlled scenarios. Document the results, compare to OEM tolerances, and re-test if any discrepancy remains. A thorough verification helps ensure ADAS reliability and driver safety after windscreen replacement.
Common pitfalls and safety considerations
Pitfalls include performing calibration without the correct targets or using an incorrect procedure for the model, failing to secure the windshield properly, or attempting a calibration in a suboptimal environment (bright sun, uneven surface, or moving vehicle). Safety considerations include wearing PPE, securing the vehicle, and ensuring that calibration is performed with the vehicle stationary unless directed otherwise by the OEM procedure. Do not proceed if the calibration tool or data contradicts the OEM instructions. If sensors show persistent misalignment, stop and re-check all mounting and connections.
Aftercare, re-checks, and maintenance over time
After calibration, perform a scheduled re-check after a short period of driving to confirm stability as the glass settles. Maintain a log of calibration actions for service records and future diagnostics. If windscreen replacement or sensor work occurs again, anticipate recalibration as part of the service cycle. Regular validation helps sustain ADAS performance and driver confidence, aligning with industry best practices and Calibrate Point’s recommendations for ongoing reliability.
Authority sources and guidance
For rigorous guidance on ADAS calibration and windscreen procedures, refer to authoritative sources such as the U.S. Department of Transportation and SAE standards. These resources provide framework and reference material for calibration workflows and system validation. Additionally, reputable calibration practices from major automotive manufacturers reinforce the importance of model-specific steps and proper tool use. See the linked sources for deeper technical detail and model-specific requirements.
Conclusion and references
This section reinforces the importance of adhering to OEM calibration procedures after windscreen replacement. While the process can be intricate, following model-specific steps, using the correct tools, and validating results through static and dynamic tests help ensure ADAS reliability and vehicle safety. Calibrate Point’s guidance emphasizes the value of documentation, professional oversight when necessary, and maintaining calibration over time for long-term performance.
Tools & Materials
- Calibration targets / reference boards(OEM-provided targets or manufacturer-approved substitutes; ensure correct height and distance per spec)
- ADAS calibration tool or compatible diagnostic scanner(OEM tool or approved third-party tool with calibration module)
- Vehicle service manual / OEM procedure(Model-specific steps and tolerances)
- Digital level / spirit level(Verify camera mounting angles and windscreen plane)
- Cleaning supplies (lint-free cloth, approved cleaner)(Clean sensor housings and windscreen edges to avoid smudges)
- Personal protective equipment (gloves, safety glasses)(Safe workspace and handling of glass components)
- Tapes, markers, and measurement tape(Optional for model-specific alignment references)
Steps
Estimated time: 60-120 minutes
- 1
Prepare vehicle and workspace
Park on a level surface, engage parking brake, and turn off the vehicle. Gather all calibration tools and ensure the windshield is clean and dry. Verify environmental conditions are suitable for calibration (stable lighting, minimal glare).
Tip: Double-check that tires are at correct pressure and that the area has no vibration sources. - 2
Access calibration mode and review manual
Connect the diagnostic tool and navigate to the ADAS calibration module per the OEM procedure. Read the model-specific steps and confirm target distances and heights before starting.
Tip: If the procedure requires a specific camera reference, confirm the exact model and software version. - 3
Mount and verify calibration targets
Position the calibration targets at the recommended distance and height. Ensure targets are level and free of obstructions. Confirm no window tint or marks interfere with the camera view.
Tip: Use a helper to hold the target steady during measurement capture. - 4
Initiate static calibration sequence
Start the static calibration in the tool, following prompts to capture baseline geometry and reference data. Record any deviation alerts and save the session if within tolerance.
Tip: If a deviation appears, re-check mounting and retake measurements. - 5
Perform dynamic calibration (if required)
Run the vehicle through the prescribed dynamic steps (e.g., straight line, gentle turns). The system will adjust based on sensor input and vehicle motion data.
Tip: Ensure the vehicle remains in a controlled environment with a trained technician supervising. - 6
Review calibration results
Examine the calibration report for convergence and success indicators. Confirm that all features initialize without warnings and that results align with OEM specs.
Tip: Take screenshots or notes for service records. - 7
Post-calibration road test
Conduct a cautious road test to validate ADAS behavior in typical traffic. Monitor lane departure warnings, braking distance, and object detection at various speeds.
Tip: Test in a safe environment until you are confident in system performance. - 8
Document and archive results
Save calibration files, write a service note, and log the date, vehicle, procedure, and tool version. This helps with future maintenance and recalls.
Tip: Keep documentation accessible for diagnostics and warranty considerations.
Questions & Answers
Is windscreen replacement always followed by calibration?
In modern vehicles with ADAS, windscreen replacement typically requires recalibration to ensure sensor accuracy. Some older or non-ADAS systems may not need recalibration, but checking the OEM procedure is essential.
Yes, for most ADAS-equipped vehicles, recalibration is required after windscreen replacement to maintain sensor accuracy.
Can I calibration myself without specialized tools?
DIY calibration can be risky on vehicles with advanced sensors. Some basic checks may be possible, but many models require OEM tools and professional setup to meet safety standards.
DIY calibration is not recommended for most modern vehicles; use OEM tools or seek a qualified technician.
What happens if calibration fails?
If calibration fails, re-check the windshield installation, sensor mounting, and targets. If issues persist, consult the OEM procedure or a pro to avoid compromising safety features.
If calibration fails, recheck mounting and tooling, then consult OEM guidance or a professional.
How long does calibration typically take?
Calibration time varies by vehicle and system complexity. It can take from a short session to a longer procedure requiring multiple steps and tests.
Calibration duration depends on the model and procedure; expect it to vary.
When should I re-check calibration after replacement?
Re-check calibration after initial road tests and again after a few days of driving, or whenever the windshield is serviced again.
Re-check after initial testing and after a short period of driving or subsequent service.
Are all ADAS features affected equally by windscreen calibration?
Most forward-facing ADAS features rely on camera alignment; some secondary sensors may be affected, but the core risk is misalignment of the primary cameras.
Camera alignment largely drives ADAS accuracy; other sensors may be affected indirectly.
Watch Video
Key Takeaways
- Verify OEM compatibility before calibration.
- Use model-specific procedures and targets.
- Validate results with static and dynamic tests.
- Document the calibration for service records.